Android Devices
These instructions are correct at time of writing for a Google Pixel running Android 11 and may vary on your device.
Download the WiFi certificate
If you have not already done so, please download the SSL Certificate
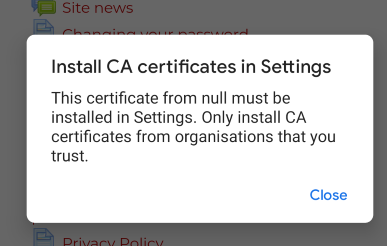
Your phone may show some messages about how to install a WiFi certificate, or that the certificate has failed to install. Dismiss or ignore these messages for now.
Poor Mobile signal?
If you do not have a good mobile signal, there is a limited access WiFi account you can use to download the certificate.
Go to your WiFi settings and connect to QueenMargarets with the password 39993999. This will connect you without internet access and your phone may complain about that - just ignore for now as you only need access to the QM network.
When you have installed the certificate, go back to your WiFi settings and Forget the QueenMargarets network.
Install the WiFi certificate
IMPORTANT
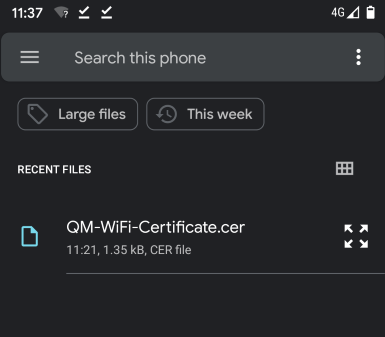
We have noticed that some Android devices will not allow you to install certificates from the default downloads folder. Please use your device’s file manager to move the downloaded certificate to the top level of your device’s internal storage.
-
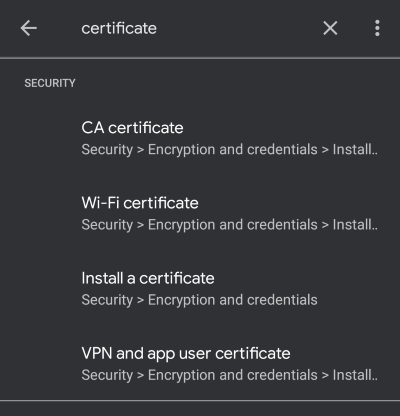
Open your device settings, tap Search settings and enter certificate.
-
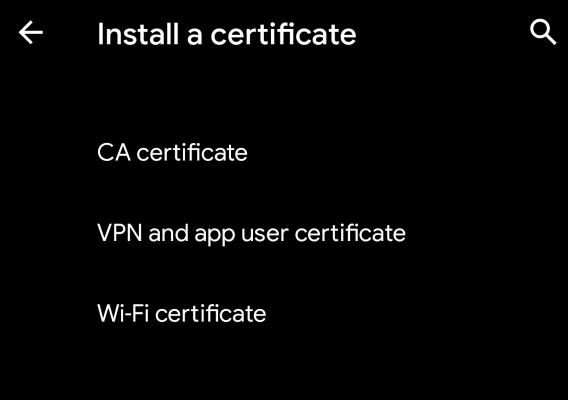
Tap Install a certificate, then tap CA certificate.
You may receive a warning that your data won’t be private, please select Install anyway
-
Tap on the downloaded certificate. If the certificate doesn’t show, tap the Three lines menu, then select Downloads.
You should see a message that the certificate has been installed.
-
From the Install a certificate menu, select Wi-Fi certificate.
-
Tap on the downloaded certificate.
-
Give the certificate a name such as QM WiFi certificate.
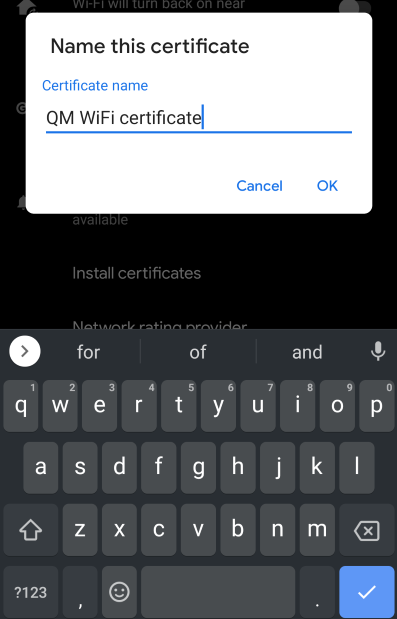
You should see a message that the certificate has been installed.
Firefox users
If you use Firefox for Android, you will have to tell it to use third party CA certificates
- Open Firefox and go to Settings
- Go to About Firefox
- Tap the Firefox logo seven times
- Go back one level
- Goto Secret Settings, the second or third setting from the bottom
- Enable Use third party CA certificates
- You may need to restart the app.
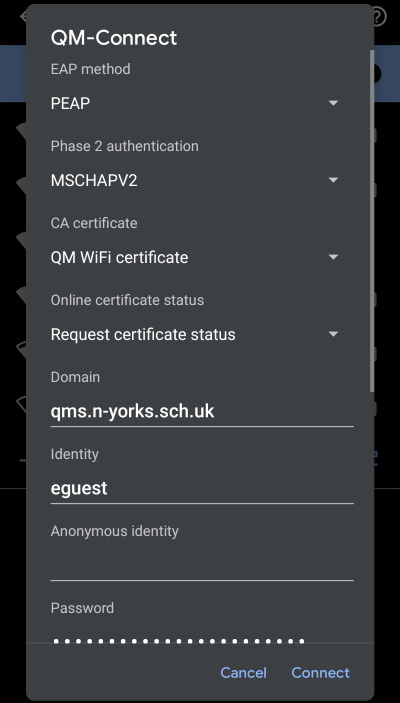
Connect to QM-Connect
In your WiFi settings, tap on the QM-Connect network and log in with the following settings:
- EAP method: PEAP
- Phase 2 authentication: MSCHAPV2
- CA certificate: QM WiFi certificate
- Online certificate status: Request certificate status
- Domain: qms.n-yorks.sch.uk
- Identity: YOUR USERNAME
- Anonymous identity: LEAVE EMPTY
- Password: YOUR PASSWORD
Notes
- Some versions of Android fill the Anonymous identity field with the word anonymous. You MUST make sure this field is EMPTY
- Some settings may be hidden. Tap on Advanced to see all available options. If one of the above options is still not available, it may not be required.
Tap Connect and you phone should connect to the network.
No internet / limited connectivity warnings
Your device may complain that is has limited connectivity, or the internet may not be available. In this case, you need to tell your device to connect anyway.
On Pixel, tap the pop-up notification, then tick Do not ask again for this network
If you miss the pop-up, you can find notification history in your device’s settings.

On Samsung, tap Always connect when prompted.

If you miss the notification
If you miss the notification or the tapping the notification doesn’t take you to the settings, you can try the following:
-
Open the properties of the WiFi network
-
Turn off auto-connect
-
Disconnect from the network
-
Connect to the network
You should now get the notification again
-
Turn auto-connect back on

Other devices and OS versions may vary.